Irrigator - LCD Version
The LCD version of the Irrigator device is designed for clear and precise monitoring of soil moisture levels, featuring a 1602 LCD display and easy-to-use configuration buttons.
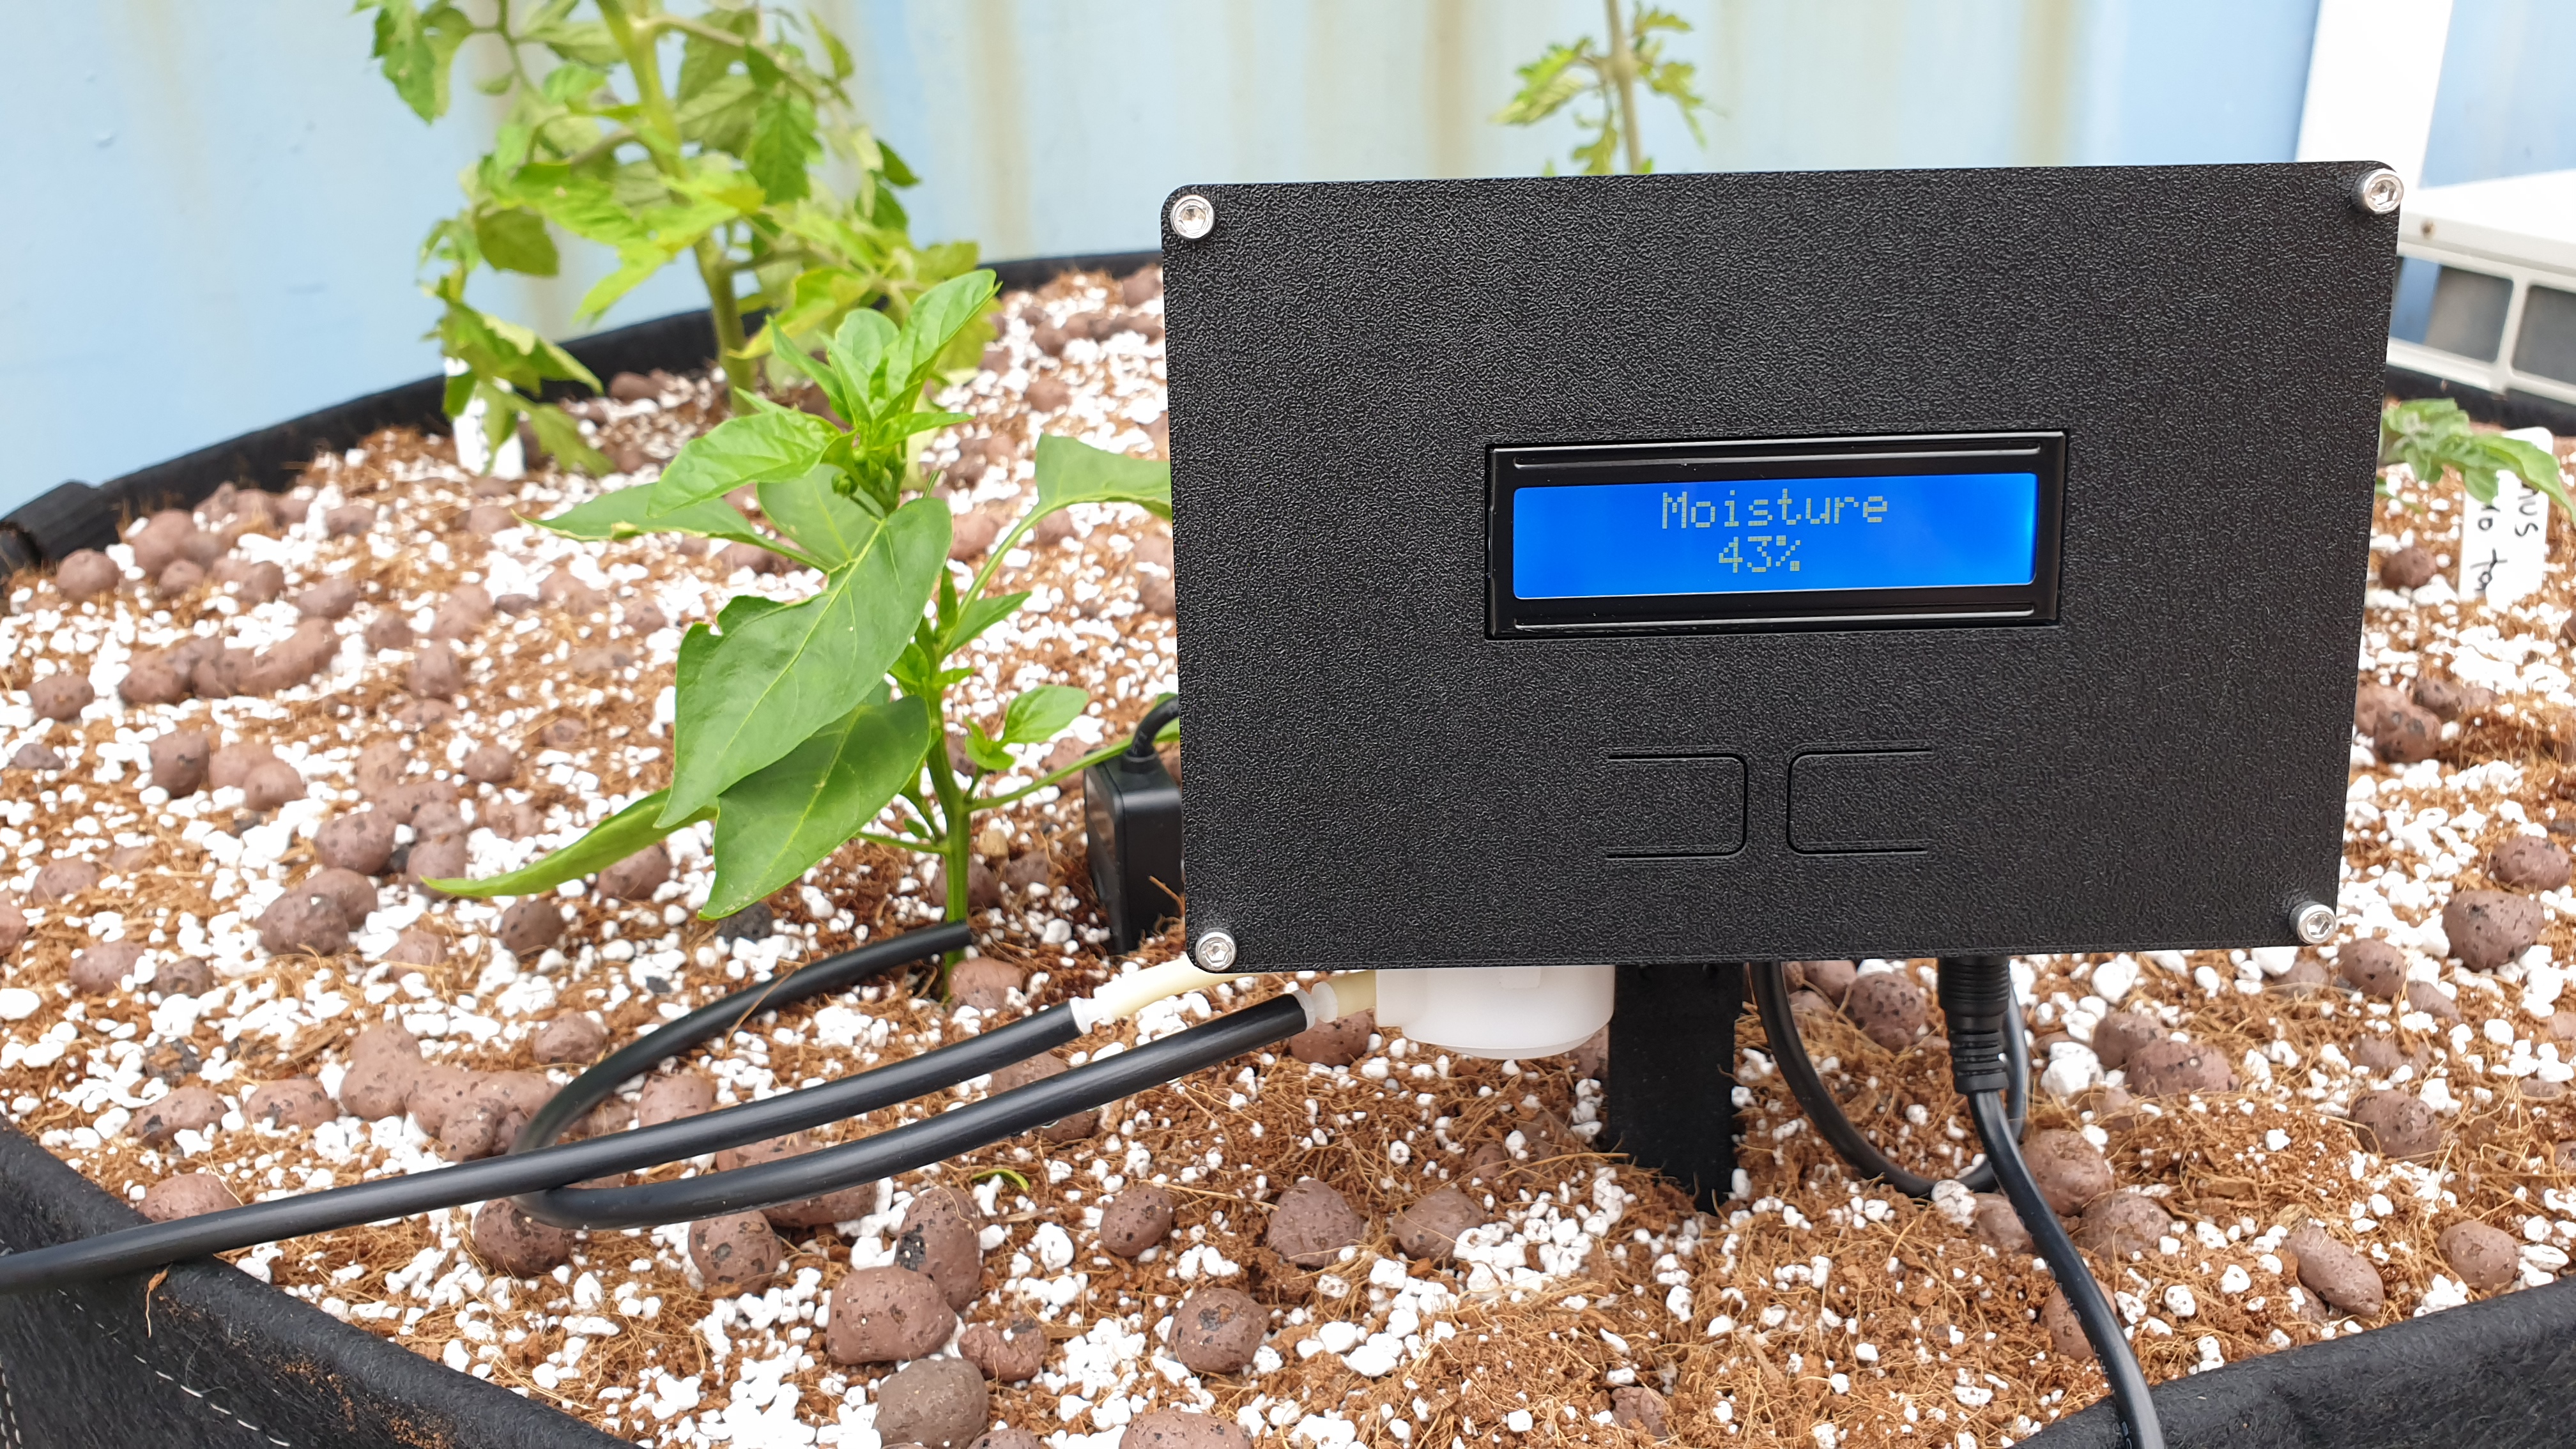
Key Features
- Waterproof soil moisture sensor.
- 1602 LCD display for clear visual feedback.
- Buttons for sensor calibration and irrigation threshold adjustment.
- Peristaltic pump embedded into the enclosure.
3D Printables
Parts List
| Part | Quantity | Notes |
|---|---|---|
| Arduino Nano | 1 | |
| Arduino Nano Expansion Board | 1 | |
| 1602 LCD Display (with I2C adapter) | 1 | |
| Capacitive Soil Moisture Sensor | 1 | |
| Momentary/Tactile Button Module | 2 | |
| Small Peristaltic Pump | 1 | |
| 4mm Tubing | 2m | |
| 15cm Twin Core Power Wire | 20cm | To connect the MOSFET module and pump. |
| IRF520 MOSFET Module | 1 | To control the pump. |
| M3 x 16mm-30mm Screws | 4 | For enclosure lid. |
| M3 x 8mm Screws | 8 | For mounting buttons and display. |
| M3 x 12mm-20mm Screws | 8 | For mounting bracket and garden stake. |
| 12v Power Supply | 1 |
Sketch Installation
- Install UltiBlox-Examples library.
- Open File -> Examples -> UltiBlox-Examples -> SensorControlDisplay in Arduino IDE.
- Adjust 'SensorConfig.h' (if needed):
- Set 'SENSOR_LABEL' to 'Moisture'.
- Set 'SENSOR_KEY' to 'M'.
- Adjust 'DisplayConfig.h' (if needed):
- Set 'ACTIVE_DISPLAY_TYPE' to 'DISPLAY_TYPE_LCD' (uncomment the relevant line).
- Click Upload.